
Dynamic Polymorphism - a Real Time Example
In this blog post we are going to see, how to achieve dynamic polymorphism in c# using interfaces through a small game simulator called War.
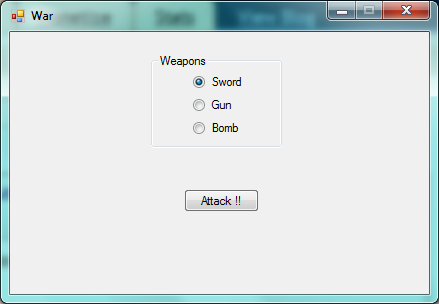
The simulator is simple and straight forward to play. The user just need to select a weapon and click on Attack.
Let me explain some theoretical background about Dynamic Polymorphism before dive into implementing the Game simulator. To put in a simple terms, Dynamic Polymorphism means changing the behavior at run time. Let us see an example of what does it mean. If a dog smells a cat, it will bark and if it smells a food, it will salivate. Here, the smelling sense of the dog is same. But depending on what does it smell, it change its behavior. Hope now you are aware of what is mean by dynamic polymorphism. Just stop reading and think what is the dynamic polymorphic behavior here in the War simulator.
Yes, you are absolutely correct!! The Attacking behavior is the dynamic polymorphic behavior. The behavior of attack button will vary with respect to the weapon the user has chosen.
Fine.. Lets dive into the code!!
Step1: Design the Main Form
- Create a new Windows Forms Application and name it as
War - Rename the
Form1.csfile toMainForm.csand ClickYesto let the Visual Studio to do the renaming for you. - Add a groupbox control and change its
TextProperty toWeapon - Add three radio button controls inside the groupbox and change their
TextProperty to Sword, Gun and bomb respectively. - Add a button control and change its
Textproperty toAttack!!. - Rename the
Nameproperty of all the controls added to some meaningful names like rboSword for Sword Radiobutton - The Final Finished will look like the screenshot in the beginning of this blog.
Step 2: Create an Interface called IWeapon
Right click on the Project name War in the solution explorer and add a new interface file called IWeapon.cs This interface IWeapon will have a public method called Attack which defines a contract so that all the Weapon we are going to create should implement this IWeapon interface and provide the implementation code for the Attack() method.
// IWeapon.cs
public interface IWeapon
{
  void Attack();
}
Step3: Create the concrete Weapon Classes
- Add three class files to the
WarProject with the namesSword.cs, ``Gun.cs,Bomb.cs` - These classes represents the actual weapons and that we are going use in our simulator. Each of these classes will implement the IWeapon interface and provide the implementation code for the
Attack()method. - Modify the class files as follows
// Sword.cs
public class Sword : IWeapon
{
  public void Attack()
  {
    System.Windows.Forms.MessageBox.Show("Sword!!");
  }
}
// Gun.cs
public class Gun : IWeapon
{
public void Attack()
{
System.Windows.Forms.MessageBox.Show("Gun!!");
}
}// Bomb.cs
public class Bomb : IWeapon
{
public void Attack()
{
System.Windows.Forms.MessageBox.Show("Bomb!!");
}
}The Attack() method will show a message box with a text saying the weapon name being used.
Step 4: Program the War Simulator Main Form
Now the stage is set for the real show. Let us wire the code of MainForm.cs and make the War simulator.
- Add a private instance variable of type IWeapon in the MainForm class and initialize with the sword class. This will hold the reference of current weapon being used Note: Sword is the default weapon.
// MainForm.cs
public partial class MainForm : Form
{
	private IWeapon weapon = new Sword();
}- Now we are going to add event handlers for the weapons radio buttons. They will change the reference stored in the instance variable
weaponto the respective Weapons class. Add the checked change event for all the radio button and their event handlers will look like as follows.
public partial class MainForm : Form
{
  // ...
  private void rboSword_CheckedChanged(object sender, EventArgs e)
  {
    weapon = new Sword();
  }
  private void rboGun_CheckedChanged(object sender, EventArgs e)
  {
    weapon = new Gun();
  }
  private void rboBomb_CheckedChanged(object sender, EventArgs e)
  {
    weapon = new Bomb();
  }
}- Add the Click event handler for the
Attackbutton. This event handler will simply call the Attack() method of the instance variableweapon
public partial class MainForm : Form
{
  // ...
  private void btnAttack_Click(object sender, EventArgs e)
  {
    weapon.Attack();
  }
}
Summary
In this blog we have seen a basic real time example on implementing dynamic polymorphism.
